


More on Personal Growth

Jari Roomer
1 year ago
After 240 articles and 2.5M views on Medium, 9 Raw Writing Tips
Late in 2018, I published my first Medium article, but I didn't start writing seriously until 2019. Since then, I've written more than 240 articles, earned over $50,000 through Medium's Partner Program, and had over 2.5 million page views.
Write A Lot
Most people don't have the patience and persistence for this simple writing secret:
Write + Write + Write = possible success
Writing more improves your skills.
The more articles you publish, the more likely one will go viral.
If you only publish once a month, you have no views. If you publish 10 or 20 articles a month, your success odds increase 10- or 20-fold.
Tim Denning, Ayodeji Awosika, Megan Holstein, and Zulie Rane. Medium is their jam. How are these authors alike? They're productive and consistent. They're prolific.
80% is publishable
Many writers battle perfectionism.
To succeed as a writer, you must publish often. You'll never publish if you aim for perfection.
Adopt the 80 percent-is-good-enough mindset to publish more. It sounds terrible, but it'll boost your writing success.
Your work won't be perfect. Always improve. Waiting for perfection before publishing will take a long time.
Second, readers are your true critics, not you. What you consider "not perfect" may be life-changing for the reader. Don't let perfectionism hinder the reader.
Don't let perfectionism hinder the reader. ou don't want to publish mediocre articles. When the article is 80% done, publish it. Don't spend hours editing. Realize it. Get feedback. Only this will work.
Make Your Headline Irresistible
We all judge books by their covers, despite the saying. And headlines. Readers, including yourself, judge articles by their titles. We use it to decide if an article is worth reading.
Make your headlines irresistible. Want more article views? Then, whether you like it or not, write an attractive article title.
Many high-quality articles are collecting dust because of dull, vague headlines. It didn't make the reader click.
As a writer, you must do more than produce quality content. You must also make people click on your article. This is a writer's job. How to create irresistible headlines:
Curiosity makes readers click. Here's a tempting example...
Example: What Women Actually Look For in a Guy, According to a Huge Study by Luba Sigaud
Use Numbers: Click-bait lists. I mean, which article would you click first? ‘Some ways to improve your productivity’ or ’17 ways to improve your productivity.’ Which would I click?
Example: 9 Uncomfortable Truths You Should Accept Early in Life by Sinem Günel
Most headlines are dull. If you want clicks, get 'sexy'. Buzzword-ify. Invoke emotion. Trendy words.
Example: 20 Realistic Micro-Habits To Live Better Every Day by Amardeep Parmar
Concise paragraphs
Our culture lacks focus. If your headline gets a click, keep paragraphs short to keep readers' attention.
Some writers use 6–8 lines per paragraph, but I prefer 3–4. Longer paragraphs lose readers' interest.
A writer should help the reader finish an article, in my opinion. I consider it a job requirement. You can't force readers to finish an article, but you can make it 'snackable'
Help readers finish an article with concise paragraphs, interesting subheadings, exciting images, clever formatting, or bold attention grabbers.
Work And Move On
I've learned over the years not to get too attached to my articles. Many writers report a strange phenomenon:
The articles you're most excited about usually bomb, while the ones you're not tend to do well.
This isn't always true, but I've noticed it in my own writing. My hopes for an article usually make it worse. The more objective I am, the better an article does.
Let go of a finished article. 40 or 40,000 views, whatever. Now let the article do its job. Onward. Next story. Start another project.
Disregard Haters
Online content creators will encounter haters, whether on YouTube, Instagram, or Medium. More views equal more haters. Fun, right?
As a web content creator, I learned:
Don't debate haters. Never.
It's a mistake I've made several times. It's tempting to prove haters wrong, but they'll always find a way to be 'right'. Your response is their fuel.
I smile and ignore hateful comments. I'm indifferent. I won't enter a negative environment. I have goals, money, and a life to build. "I'm not paid to argue," Drake once said.
Use Grammarly
Grammarly saves me as a non-native English speaker. You know Grammarly. It shows writing errors and makes article suggestions.
As a writer, you need Grammarly. I have a paid plan, but their free version works. It improved my writing greatly.
Put The Reader First, Not Yourself
Many writers write for themselves. They focus on themselves rather than the reader.
Ask yourself:
This article teaches what? How can they be entertained or educated?
Personal examples and experiences improve writing quality. Don't focus on yourself.
It's not about you, the content creator. Reader-focused. Putting the reader first will change things.
Extreme ownership: Stop blaming others
I remember writing a lot on Medium but not getting many views. I blamed Medium first. Poor algorithm. Poor publishing. All sucked.
Instead of looking at what I could do better, I blamed others.
When you blame others, you lose power. Owning your results gives you power.
As a content creator, you must take full responsibility. Extreme ownership means 100% responsibility for work and results.
You don’t blame others. You don't blame the economy, president, platform, founders, or audience. Instead, you look for ways to improve. Few people can do this.
Blaming is useless. Zero. Taking ownership of your work and results will help you progress. It makes you smarter, better, and stronger.
Instead of blaming others, you'll learn writing, marketing, copywriting, content creation, productivity, and other skills. Game-changer.

Scott Stockdale
1 year ago
A Day in the Life of Lex Fridman Can Help You Hit 6-Month Goals
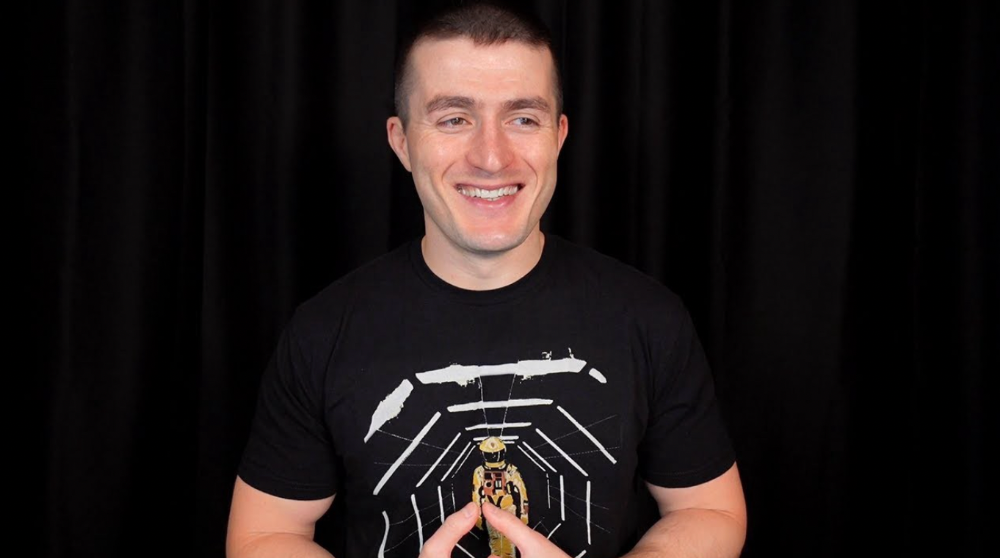
The Lex Fridman podcast host has interviewed Elon Musk.
Lex is a minimalist YouTuber. His videos are sloppy. Suits are his trademark.
In a video, he shares a typical day. I've smashed my 6-month goals using its ideas.
Here's his schedule.
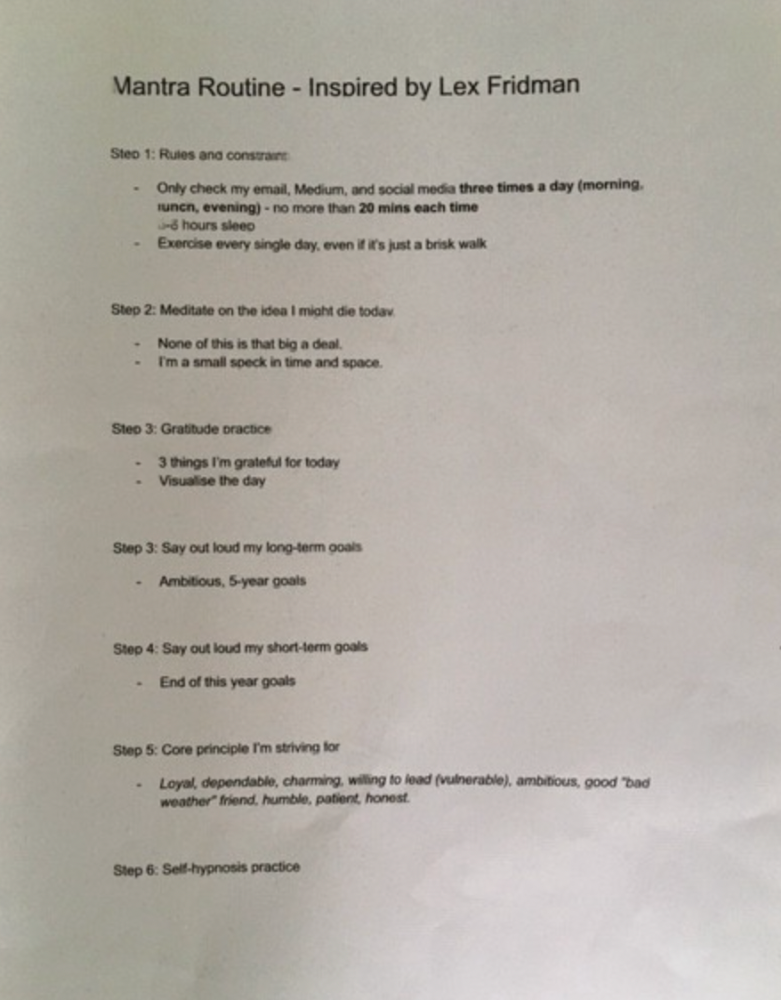
Morning Mantra
Not woo-woo. Lex's mantra reflects his practicality.
Four parts.
Rulebook
"I remember the game's rules," he says.
Among them:
Sleeping 6–8 hours nightly
1–3 times a day, he checks social media.
Every day, despite pain, he exercises. "I exercise uninjured body parts."
Visualize
He imagines his day. "Like Sims..."
He says three things he's grateful for and contemplates death.
"Today may be my last"
Objectives
Then he visualizes his goals. He starts big. Five-year goals.
Short-term goals follow. Lex says they're year-end goals.
Near but out of reach.
Principles
He lists his principles. Assertions. His goals.
He acknowledges his cliche beliefs. Compassion, empathy, and strength are key.
Here's my mantra routine:
Four-Hour Deep Work
Lex begins a four-hour deep work session after his mantra routine. Today's toughest.
AI is Lex's specialty. His video doesn't explain what he does.
Clearly, he works hard.
Before starting, he has water, coffee, and a bathroom break.
"During deep work sessions, I minimize breaks."
He's distraction-free. Phoneless. Silence. Nothing. Any loose ideas are typed into a Google doc for later. He wants to work.
"Just get the job done. Don’t think about it too much and feel good once it’s complete." — Lex Fridman
30-Minute Social Media & Music
After his first deep work session, Lex rewards himself.
10 minutes on social media, 20 on music. Upload content and respond to comments in 10 minutes. 20 minutes for guitar or piano.
"In the real world, I’m currently single, but in the music world, I’m in an open relationship with this beautiful guitar. Open relationship because sometimes I cheat on her with the acoustic." — Lex Fridman
Two-hour exercise
Then exercise for two hours.
Daily runs six miles. Then he chooses how far to go. Run time is an hour.
He does bodyweight exercises. Every minute for 15 minutes, do five pull-ups and ten push-ups. It's David Goggins-inspired. He aims for an hour a day.
He's hungry. Before running, he takes a salt pill for electrolytes.
He'll then take a one-minute cold shower while listening to cheesy songs. Afterward, he might eat.
Four-Hour Deep Work
Lex's second work session.
He works 8 hours a day.
Again, zero distractions.
Eating
The video's meal doesn't look appetizing, but it's healthy.
It's ground beef with vegetables. Cauliflower is his "ground-floor" veggie. "Carrots are my go-to party food."
Lex's keto diet includes 1800–2000 calories.
He drinks a "nutrient-packed" Atheltic Greens shake and takes tablets. It's:
One daily tablet of sodium.
Magnesium glycinate tablets stopped his keto headaches.
Potassium — "For electrolytes"
Fish oil: healthy joints
“So much of nutrition science is barely a science… I like to listen to my own body and do a one-person, one-subject scientific experiment to feel good.” — Lex Fridman
Four-hour shallow session
This work isn't as mentally taxing.
Lex planned to:
Finish last session's deep work (about an hour)
Adobe Premiere podcasting (about two hours).
Email-check (about an hour). Three times a day max. First, check for emergencies.
If he's sick, he may watch Netflix or YouTube documentaries or visit friends.
“The possibilities of chaos are wide open, so I can do whatever the hell I want.” — Lex Fridman
Two-hour evening reading
Nonstop work.
Lex ends the day reading academic papers for an hour. "Today I'm skimming two machine learning and neuroscience papers"
This helps him "think beyond the paper."
He reads for an hour.
“When I have a lot of energy, I just chill on the bed and read… When I’m feeling tired, I jump to the desk…” — Lex Fridman
Takeaways
Lex's day-in-the-life video is inspiring.
He has positive energy and works hard every day.
Schedule:
Mantra Routine includes rules, visualizing, goals, and principles.
Deep Work Session #1: Four hours of focus.
10 minutes social media, 20 minutes guitar or piano. "Music brings me joy"
Six-mile run, then bodyweight workout. Two hours total.
Deep Work #2: Four hours with no distractions. Google Docs stores random thoughts.
Lex supplements his keto diet.
This four-hour session is "open to chaos."
Evening reading: academic papers followed by fiction.
"I value some things in life. Work is one. The other is loving others. With those two things, life is great." — Lex Fridman

Daniel Vassallo
1 year ago
Why I quit a $500K job at Amazon to work for myself
I quit my 8-year Amazon job last week. I wasn't motivated to do another year despite promotions, pay, recognition, and praise.
In AWS, I built developer tools. I could have worked in that field forever.
I became an Amazon developer. Within 3.5 years, I was promoted twice to senior engineer and would have been promoted to principal engineer if I stayed. The company said I had great potential.
Over time, I became a reputed expert and leader within the company. I was respected.
First year I made $75K, last year $511K. If I stayed another two years, I could have made $1M.
Despite Amazon's reputation, my work–life balance was good. I no longer needed to prove myself and could do everything in 40 hours a week. My team worked from home once a week, and I rarely opened my laptop nights or weekends.
My coworkers were great. I had three generous, empathetic managers. I’m very grateful to everyone I worked with.
Everything was going well and getting better. My motivation to go to work each morning was declining despite my career and income growth.
Another promotion, pay raise, or big project wouldn't have boosted my motivation. Motivation was also waning. It was my freedom.
Demotivation
My motivation was high in the beginning. I worked with someone on an internal tool with little scrutiny. I had more freedom to choose how and what to work on than in recent years. Me and another person improved it, talked to users, released updates, and tested it. Whatever we wanted, we did. We did our best and were mostly self-directed.
In recent years, things have changed. My department's most important project had many stakeholders and complex goals. What I could do depended on my ability to convince others it was the best way to achieve our goals.
Amazon was always someone else's terms. The terms started out simple (keep fixing it), but became more complex over time (maximize all goals; satisfy all stakeholders). Working in a large organization imposed restrictions on how to do the work, what to do, what goals to set, and what business to pursue. This situation forced me to do things I didn't want to do.
Finding New Motivation
What would I do forever? Not something I did until I reached a milestone (an exit), but something I'd do until I'm 80. What could I do for the next 45 years that would make me excited to wake up and pay my bills? Is that too unambitious? Nope. Because I'm motivated by two things.
One is an external carrot or stick. I'm not forced to file my taxes every April, but I do because I don't want to go to jail. Or I may not like something but do it anyway because I need to pay the bills or want a nice car. Extrinsic motivation
One is internal. When there's no carrot or stick, this motivates me. This fuels hobbies. I wanted a job that was intrinsically motivated.
Is this too low-key? Extrinsic motivation isn't sustainable. Getting promoted felt good for a week, then it was over. When I hit $100K, I admired my W2 for a few days, but then it wore off. Same thing happened at $200K, $300K, $400K, and $500K. Earning $1M or $10M wouldn't change anything. I feel the same about every material reward or possession. Getting them feels good at first, but quickly fades.
Things I've done since I was a kid, when no one forced me to, don't wear off. Coding, selling my creations, charting my own path, and being honest. Why not always use my strengths and motivation? I'm lucky to live in a time when I can work independently in my field without large investments. So that’s what I’m doing.
What’s Next?
I'm going all-in on independence and will make a living from scratch. I won't do only what I like, but on my terms. My goal is to cover my family's expenses before my savings run out while doing something I enjoy. What more could I want from my work?
You can now follow me on Twitter as I continue to document my journey.
This post is a summary. Read full article here
You might also like

Recep İnanç
1 year ago
Effective Technical Book Reading Techniques

Technical books aren't like novels. We need a new approach to technical texts. I've spent years looking for a decent reading method. I tried numerous ways before finding one that worked. This post explains how I read technical books efficiently.
What Do I Mean When I Say Effective?
Effectiveness depends on the book. Effective implies I know where to find answers after reading a reference book. Effective implies I learned the book's knowledge after reading it.
I use reference books as tools in my toolkit. I won't carry all my tools; I'll merely need them. Non-reference books teach me techniques. I never have to make an effort to use them since I always have them.
Reference books I like:
Design Patterns: Elements of Reusable Object-Oriented Software
Refactoring: Improving the Design of Existing Code
You can also check My Top Takeaways from Refactoring here.
Non-reference books I like:
The Approach
Technical books might be overwhelming to read in one sitting. Especially when you have no idea what is coming next as you read. When you don't know how deep the rabbit hole goes, you feel lost as you read. This is my years-long method for overcoming this difficulty.
Whether you follow the step-by-step guide or not, remember these:
Understand the terminology. Make sure you get the meaning of any terms you come across more than once. The likelihood that a term will be significant increases as you encounter it more frequently.
Know when to stop. I've always believed that in order to truly comprehend something, I must delve as deeply as possible into it. That, however, is not usually very effective. There are moments when you have to draw the line and start putting theory into practice (if applicable).
Look over your notes. When reading technical books or documents, taking notes is a crucial habit to develop. Additionally, you must regularly examine your notes if you want to get the most out of them. This will assist you in internalizing the lessons you acquired from the book. And you'll see that the urge to review reduces with time.
Let's talk about how I read a technical book step by step.
0. Read the Foreword/Preface
These sections are crucial in technical books. They answer Who should read it, What each chapter discusses, and sometimes How to Read? This is helpful before reading the book. Who could know the ideal way to read the book better than the author, right?
1. Scanning
I scan the chapter. Fast scanning is needed.
I review the headings.
I scan the pictures quickly.
I assess the chapter's length to determine whether I might divide it into more manageable sections.
2. Skimming
Skimming is faster than reading but slower than scanning.
I focus more on the captions and subtitles for the photographs.
I read each paragraph's opening and closing sentences.
I examined the code samples.
I attempt to grasp each section's basic points without getting bogged down in the specifics.
Throughout the entire reading period, I make an effort to make mental notes of what may require additional attention and what may not. Because I don't want to spend time taking physical notes, kindly notice that I am using the term "mental" here. It is much simpler to recall. You may think that this is more significant than typing or writing “Pay attention to X.”
I move on quickly. This is something I considered crucial because, when trying to skim, it is simple to start reading the entire thing.
3. Complete reading
Previous steps pay off.
I finished reading the chapter.
I concentrate on the passages that I mentally underlined when skimming.
I put the book away and make my own notes. It is typically more difficult than it seems for me. But it's important to speak in your own words. You must choose the right words to adequately summarize what you have read. How do those words make you feel? Additionally, you must be able to summarize your notes while you are taking them. Sometimes as I'm writing my notes, I realize I have no words to convey what I'm thinking or, even worse, I start to doubt what I'm writing down. This is a good indication that I haven't internalized that idea thoroughly enough.
I jot my inquiries down. Normally, I read on while compiling my questions in the hopes that I will learn the answers as I read. I'll explore those issues more if I wasn't able to find the answers to my inquiries while reading the book.
Bonus!
Best part: If you take lovely notes like I do, you can publish them as a blog post with a few tweaks.
Conclusion
This is my learning journey. I wanted to show you. This post may help someone with a similar learning style. You can alter the principles above for any technical material.

Koji Mochizuki
2 years ago
How to Launch an NFT Project by Yourself
Creating 10,000 auto-generated artworks, deploying a smart contract to the Ethereum / Polygon blockchain, setting up some tools, etc.
There is so much to do from launching to running an NFT project. Creating parts for artworks, generating 10,000 unique artworks and metadata, creating a smart contract and deploying it to a blockchain network, creating a website, creating a Twitter account, setting up a Discord server, setting up an OpenSea collection. In addition, you need to have MetaMask installed in your browser and have some ETH / MATIC. Did you get tired of doing all this? Don’t worry, once you know what you need to do, all you have to do is do it one by one.
To be honest, it’s best to run an NFT project in a team of three or more, including artists, developers, and marketers. However, depending on your motivation, you can do it by yourself. Some people might come later to offer help with your project. The most important thing is to take a step as soon as possible.
Creating Parts for Artworks
There are lots of free/paid software for drawing, but after all, I think Adobe Illustrator or Photoshop is the best. The images of Skulls In Love are a composite of 48x48 pixel parts created using Photoshop.
The most important thing in creating parts for generative art is to repeatedly test what your artworks will look like after each layer has been combined. The generated artworks should not be too unnatural.
How Many Parts Should You Create?
Are you wondering how many parts you should create to avoid duplication as much as possible when generating your artworks? My friend Stephane, a developer, has created a great tool to help with that.
Generating 10,000 Unique Artworks and Metadata
I highly recommend using the HashLips Art Engine to generate your artworks and metadata. Perhaps there is no better artworks generation tool at the moment.
GitHub: https://github.com/HashLips/hashlips_art_engine
YouTube:
Storing Artworks and Metadata
Ideally, the generated artworks and metadata should be stored on-chain, but if you want to store them off-chain, you should use IPFS. Do not store in centralized storage. This is because data will be lost if the server goes down or if the company goes down. On the other hand, IPFS is a more secure way to find data because it utilizes a distributed, decentralized system.
Storing to IPFS is easy with Pinata, NFT.Storage, and so on. The Skulls In Love uses Pinata. It’s very easy to use, just upload the folder containing your artworks.
Creating and Deploying a Smart Contract
You don’t have to create a smart contract from scratch. There are many great NFT projects, many of which publish their contract source code on Etherscan / PolygonScan. You can choose the contract you like and reuse it. Of course, that requires some knowledge of Solidity, but it depends on your efforts. If you don’t know which contract to choose, use the HashLips smart contract. It’s very simple, but it has almost all the functions you need.
GitHub: https://github.com/HashLips/hashlips_nft_contract
Note: Later on, you may want to change the cost value. You can change it on Remix or Etherscan / PolygonScan. But in this case, enter the Wei value instead of the Ether value. For example, if you want to sell for 1 MATIC, you have to enter “1000000000000000000”. If you set this value to “1”, you will have a nightmare. I recommend using Simple Unit Converter as a tool to calculate the Wei value.
Creating a Website
The website here is not just a static site to showcase your project, it’s a so-called dApp that allows you to access your smart contract and mint NFTs. In fact, this level of dApp is not too difficult for anyone who has ever created a website. Because the ethers.js / web3.js libraries make it easy to interact with your smart contract. There’s also no problem connecting wallets, as MetaMask has great documentation.
The Skulls In Love uses a simple, fast, and modern dApp that I built from scratch using Next.js. It is published on GitHub, so feel free to use it.
Why do people mint NFTs on a website?
Ethereum’s gas fees are high, so if you mint all your NFTs, there will be a huge initial cost. So it makes sense to get the buyers to help with the gas fees for minting.
What about Polygon? Polygon’s gas fees are super cheap, so even if you mint 10,000 NFTs, it’s not a big deal. But we don’t do that. Since NFT projects are a kind of game, it involves the fun of not knowing what will come out after minting.
Creating a Twitter Account
I highly recommend creating a Twitter account. Twitter is an indispensable tool for announcing giveaways and reaching more people. It’s better to announce your project and your artworks little by little, 1–2 weeks before launching your project.
Creating and Setting Up a Discord Server
I highly recommend creating a Discord server as well as a Twitter account. The Discord server is a community and its home. Fans of your NFT project will want to join your community and interact with many other members. So, carefully create each channel on your Discord server to make it a cozy place for your community members.
If you are unfamiliar with Discord, you may be particularly confused by the following:
What bots should I use?
How should I set roles and permissions?
But don’t worry. There are lots of great YouTube videos and blog posts about these.
It’s also a good idea to join the Discord servers of some NFT projects and see how they’re made. Our Discord server is so simple that even beginners will find it easy to understand. Please join us and see it!
Note: First, create a test account and a test server to make sure your bots and permissions work properly. It is better to verify the behavior on the test server before setting up your production server.
UPDATED: As your Discord server grows, you cannot manage it on your own. In this case, you will be hiring several moderators, but choose carefully before hiring. And don’t give them important role permissions right after hiring. Initially, the same permissions as other members are sufficient. After a while, you can add permissions as needed, such as kicking/banning, using the “@every” tag, and adding roles. Again, don’t immediately give significant permissions to your Mod role. Your server can be messed up by fake moderators.
Setting Up Your OpenSea Collection
Before you start selling your NFTs, you need to reserve some for airdrops, giveaways, staff, and more. It’s up to you whether it’s 100, 500, or how many.
After minting some of your NFTs, your account and collection should have been created in OpenSea. Go to OpenSea, connect to your wallet, and set up your collection. Just set your logo, banner image, description, links, royalties, and more. It’s not that difficult.
Promoting Your Project
After all, promotion is the most important thing. In fact, almost every successful NFT project spends a lot of time and effort on it.
In addition to Twitter and Discord, it’s even better to use Instagram, Reddit, and Medium. Also, register your project in NFTCalendar and DISBOARD
DISBOARD is the public Discord server listing community.
About Promoters
You’ll probably get lots of contacts from promoters on your Discord, Twitter, Instagram, and more. But most of them are scams, so don’t pay right away. If you have a promoter that looks attractive to you, be sure to check the promoter’s social media accounts or website to see who he/she is. They basically charge in dollars. The amount they charge isn’t cheap, but promoters with lots of followers may have some temporary effect on your project. Some promoters accept 50% prepaid and 50% postpaid. If you can afford it, it might be worth a try. I never ask them, though.
When Should the Promotion Activities Start?
You may be worried that if you promote your project before it starts, someone will copy your project (artworks). It is true that some projects have actually suffered such damage. I don’t have a clear answer to this question right now, but:
- Do not publish all the information about your project too early
- The information should be released little by little
- Creating artworks that no one can easily copy
I think these are important.
If anyone has a good idea, please share it!
About Giveaways
When hosting giveaways, you’ll probably use multiple social media platforms. You may want to grow your Discord server faster. But if joining the Discord server is included in the giveaway requirements, some people hate it. I recommend holding giveaways for each platform. On Twitter and Reddit, you should just add the words “Discord members-only giveaway is being held now! Please join us if you like!”.
If you want to easily pick a giveaway winner in your browser, I recommend Twitter Picker.
Precautions for Distributing Free NFTs
If you want to increase your Twitter followers and Discord members, you can actually get a lot of people by holding events such as giveaways and invite contests. However, distributing many free NFTs at once can be dangerous. Some people who want free NFTs, as soon as they get a free one, sell it at a very low price on marketplaces such as OpenSea. They don’t care about your project and are only thinking about replacing their own “free” NFTs with Ethereum. The lower the floor price of your NFTs, the lower the value of your NFTs (project). Try to think of ways to get people to “buy” your NFTs as much as possible.
Ethereum vs. Polygon
Even though Ethereum has high gas fees, NFT projects on the Ethereum network are still mainstream and popular. On the other hand, Polygon has very low gas fees and fast transaction processing, but NFT projects on the Polygon network are not very popular.
Why? There are several reasons, but the biggest one is that it’s a lot of work to get MATIC (on Polygon blockchain, use MATIC instead of ETH) ready to use. Simply put, you need to bridge your tokens to the Polygon chain. So people need to do this first before minting your NFTs on your website. It may not be a big deal for those who are familiar with crypto and blockchain, but it may be complicated for those who are not. I hope that the tedious work will be simplified in the near future.
If you are confident that your NFTs will be purchased even if they are expensive, or if the total supply of your NFTs is low, you may choose Ethereum. If you just want to save money, you should choose Polygon. Keep in mind that gas fees are incurred not only when minting, but also when performing some of your smart contract functions and when transferring your NFTs.
If I were to launch a new NFT project, I would probably choose Ethereum or Solana.
Conclusion
Some people may want to start an NFT project to make money, but don’t forget to enjoy your own project. Several months ago, I was playing with creating generative art by imitating the CryptoPunks. I found out that auto-generated artworks would be more interesting than I had imagined, and since then I’ve been completely absorbed in generative art.
This is one of the Skulls In Love artworks:
This character wears a cowboy hat, black slim sunglasses, and a kimono. If anyone looks like this, I can’t help laughing!
The Skulls In Love NFTs can be minted for a small amount of MATIC on the official website. Please give it a try to see what kind of unique characters will appear 💀💖
Thank you for reading to the end. I hope this article will be helpful to those who want to launch an NFT project in the future ✨
Sam Hickmann
2 years ago
A quick guide to formatting your text on INTΞGRITY
[06/20/2022 update] We have now implemented a powerful text editor, but you can still use markdown.
Markdown:
Headers
SYNTAX:
# This is a heading 1
## This is a heading 2
### This is a heading 3
#### This is a heading 4
RESULT:
This is a heading 1
This is a heading 2
This is a heading 3
This is a heading 4
Emphasis
SYNTAX:
**This text will be bold**
~~Strikethrough~~
*You **can** combine them*
RESULT:
This text will be italic
This text will be bold
You can combine them
Images
SYNTAX:
RESULT:
Videos
SYNTAX:
https://www.youtube.com/watch?v=7KXGZAEWzn0
RESULT:
Links
SYNTAX:
[Int3grity website](https://www.int3grity.com)
RESULT:
Tweets
SYNTAX:
https://twitter.com/samhickmann/status/1503800505864130561
RESULT:
Blockquotes
SYNTAX:
> Human beings face ever more complex and urgent problems, and their effectiveness in dealing with these problems is a matter that is critical to the stability and continued progress of society. \- Doug Engelbart, 1961
RESULT:
Human beings face ever more complex and urgent problems, and their effectiveness in dealing with these problems is a matter that is critical to the stability and continued progress of society. - Doug Engelbart, 1961
Inline code
SYNTAX:
Text inside `backticks` on a line will be formatted like code.
RESULT:
Text inside backticks on a line will be formatted like code.
Code blocks
SYNTAX:
'''js
function fancyAlert(arg) {
  if(arg) {
    $.facebox({div:'#foo'})
  }
}
'''
RESULT:
function fancyAlert(arg) {
if(arg) {
$.facebox({div:'#foo'})
}
}
Maths
We support LaTex to typeset math. We recommend reading the full documentation on the official website
SYNTAX:
$$[x^n+y^n=z^n]$$
RESULT:
[x^n+y^n=z^n]
Tables
SYNTAX:
| header a | header b |
| ---- | ---- |
| row 1 col 1 | row 1 col 2 |
RESULT:
| header a | header b | header c |
|---|---|---|
| row 1 col 1 | row 1 col 2 | row 1 col 3 |